DIY: PAPER BOXES
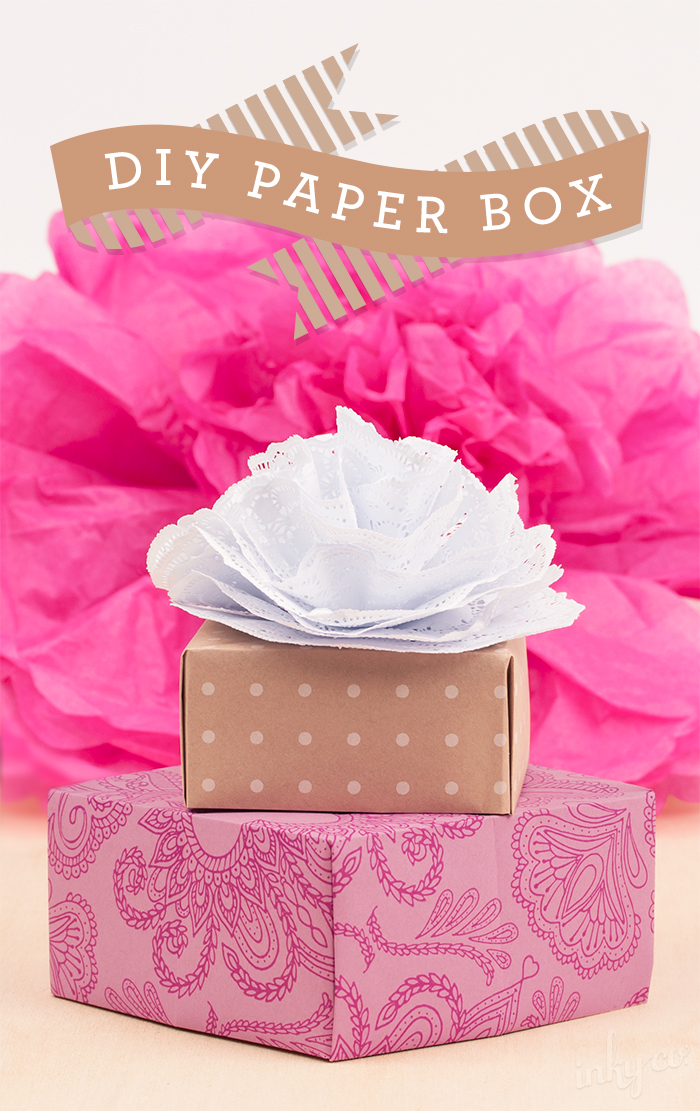
Mother's Day always seems to sneak up on me during a busy time of the year. I have been guilty in the past of wrapping my gifts for Mum the morning of (sorry Mum)! And there is nothing worse than finding that the small gift you've bought is just that little bit too awkward of a shape to wrap. So this Mother's Day, rather than giving Mum a gift looking like your Grade 3 craft project, why not create some wrapping paper gift boxes! Perfect for those small items (like jewellery), these can be whipped up nice and quick so your Mum can enjoy not only the gift, but beautiful gift wrapping.
You will need:
Wrapping Paper (we used Mamata Hot Pink)
Scalpel or Craft Knife
Ruler
Pencil
Clear Seals or sticky tape
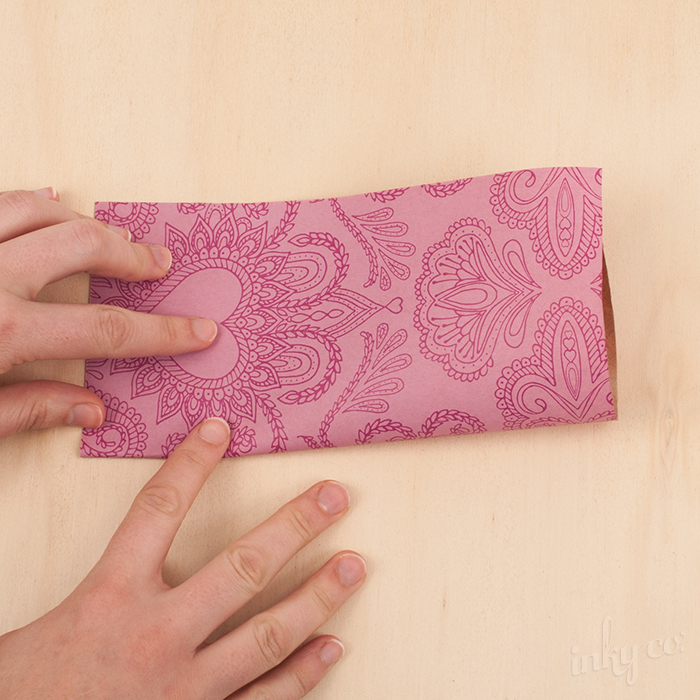
Step 1. Cut out two squares of wrapping paper. For the box shown we used squares: 18.5cm (base) and 20cm (lid). You can change the size of your box to suit your needs but remember that the lid should always be around 1-1.5cm bigger. Ensure that your corners are completely square as this will give you a nice neat box.
Step 2. Lay one of your sheets down on your workspace colour side down. Fold the sheet in half, long edge to long edge. Open the sheet back out, turning the paper 90 degrees and fold in half again.
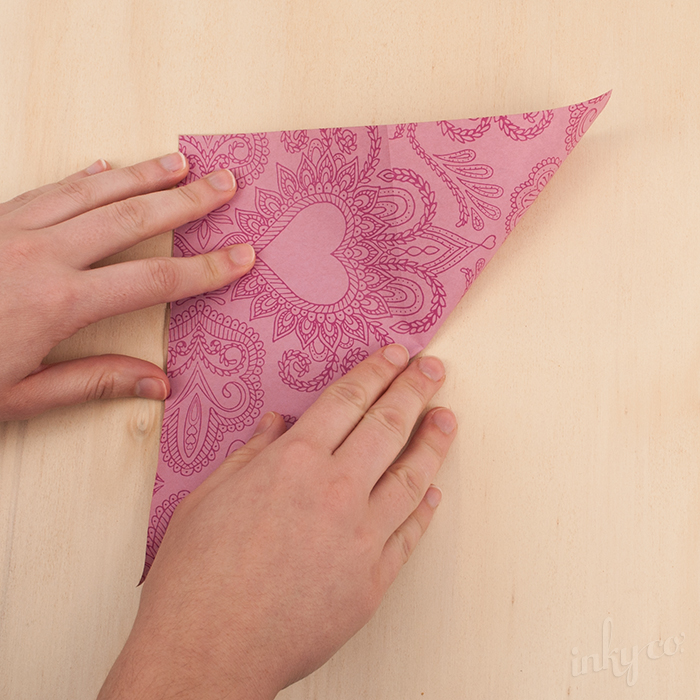
Step 3. Open the edges back out and fold your sheet in half diagonally. Open out and repeat for the other corner.
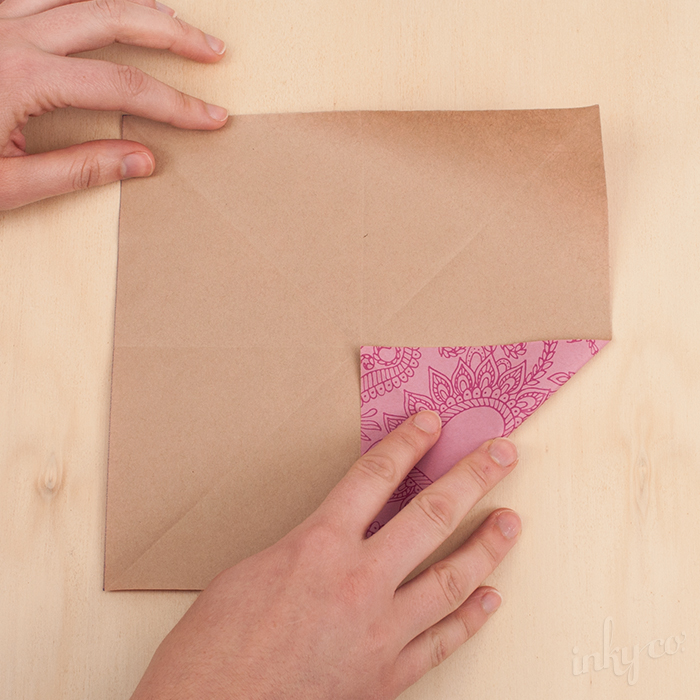
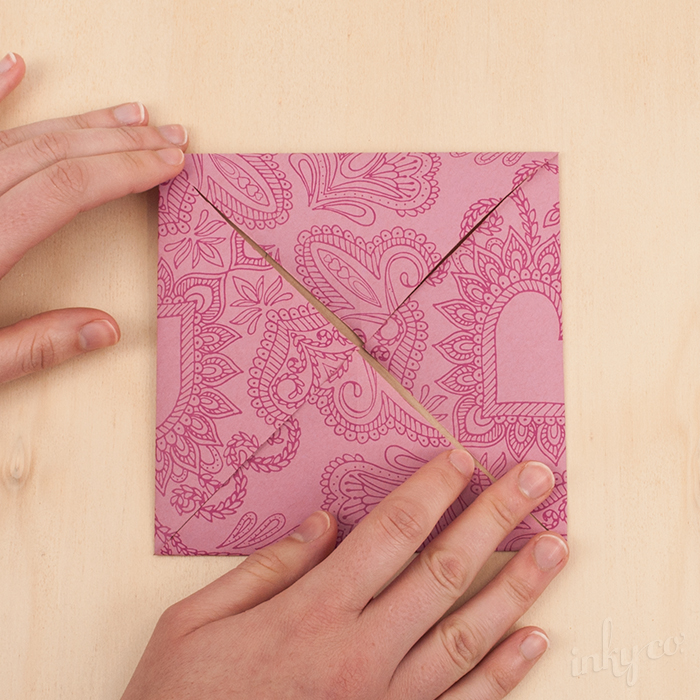
Step 4. Open the edges back out and then fold all four corners into the middle.
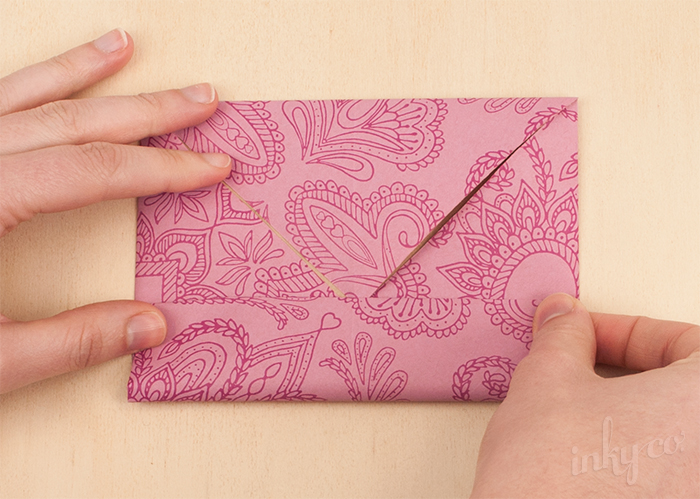
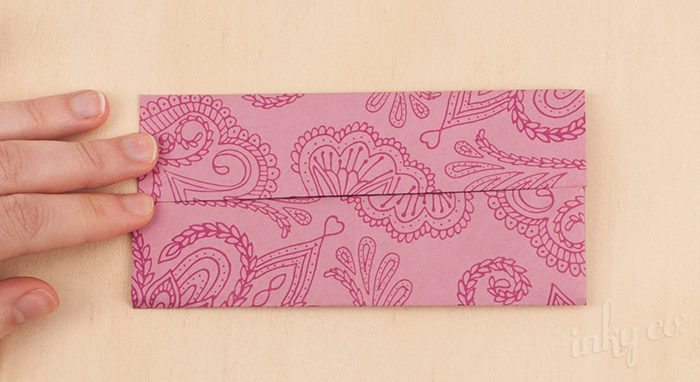
Step 5. Fold the bottom and top long edges into the centre. Unfold these flaps back out and repeat this for both the side edges.
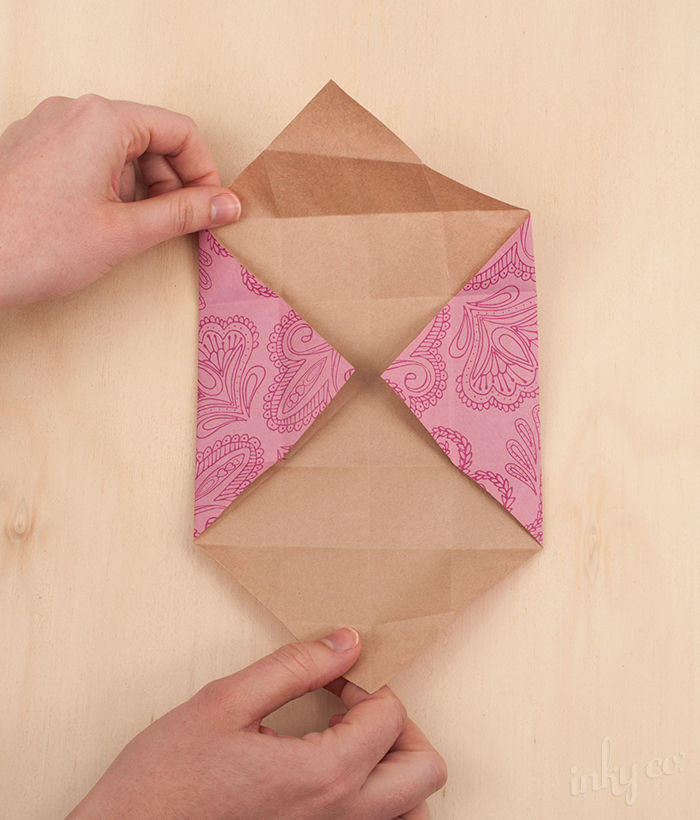
Step 6. Unfold these flaps back out. Unfold the top and bottom corners, leaving the sides folded in.
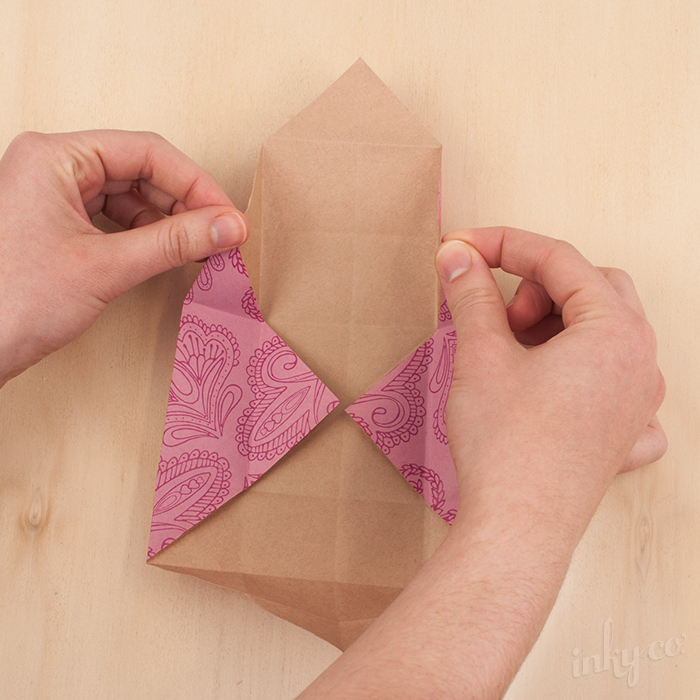
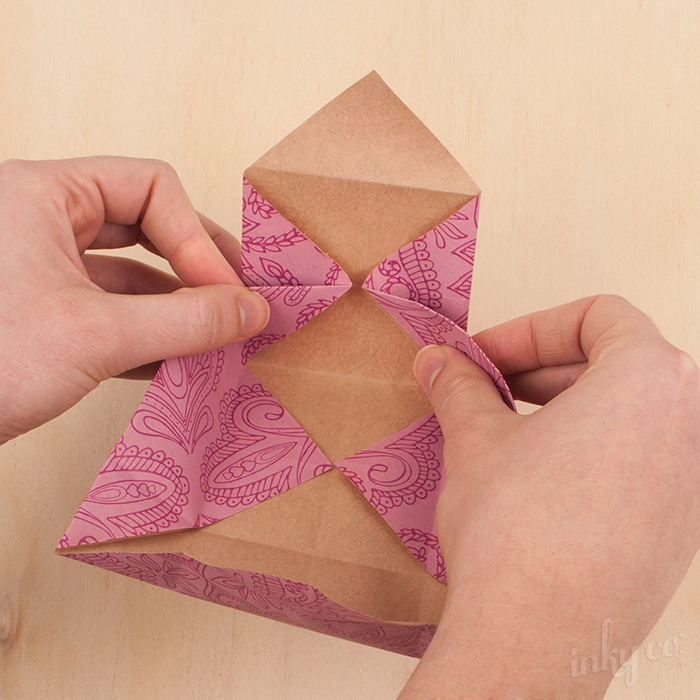
Step 7. At the top of each long edge, take the point where the top and bottom corners have been folded out from, and fold them in together to touch at the centre line. As you pull these inwards the sides of the box should pop up to allow you to touch the points together.
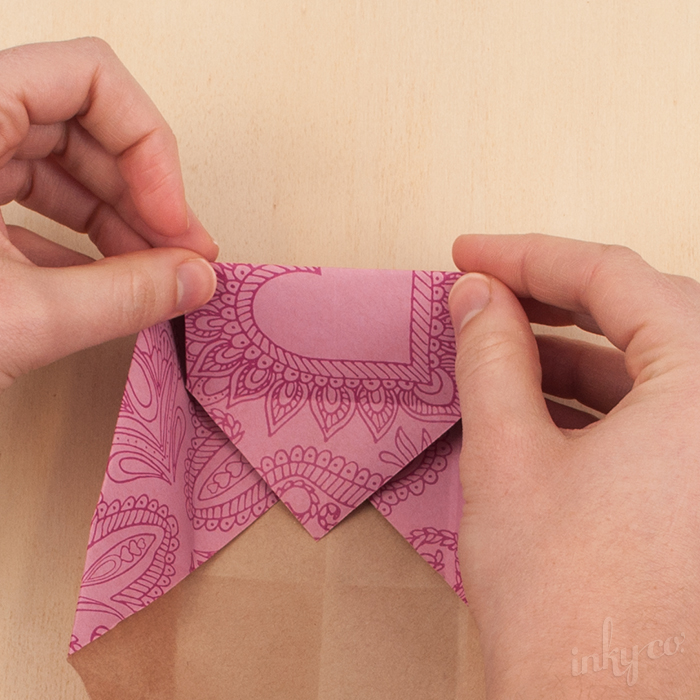
Step 8. Fold over the top flap to create your sides. Repeat step 7 and 8 for the other open side.
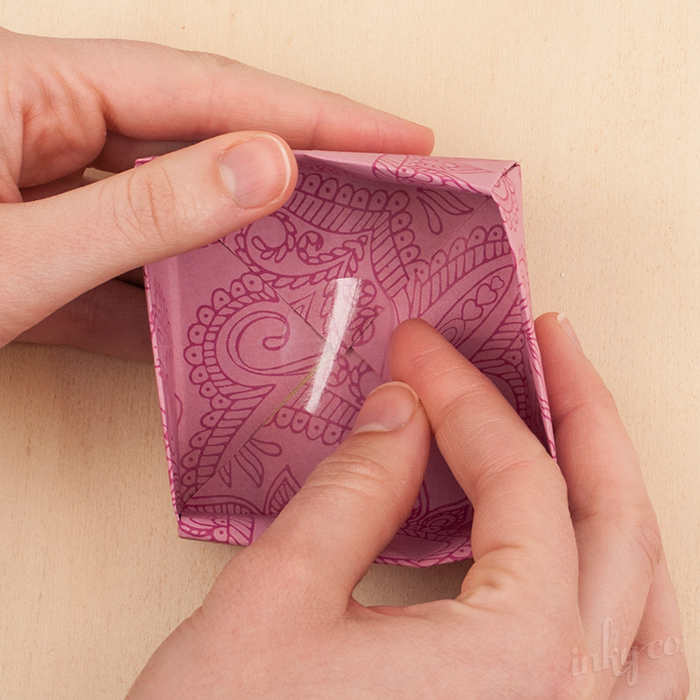
Step 9. Using a Clear Seal or tape, secure the four corners in the centre of the inside of your box to ensure it doesn’t unfold. You have now completed half of your box.
Step 10. Repeat steps 1-9 to make the other half of your box. Once you have both pieces, slot the smaller piece into the larger piece and your box is ready to fill with goodies!
